A 30-Minute Workflow for Turning AI Agent Tool Logs into Permission Boundary Diagrams
By Taylor
Turn AI agent tool logs into a permission diagram and least-privilege checklist in 30 minutes with a simple, repeatable workflow.
Why tool-use logs are the fastest path to least-privilege
AI agents tend to “work” long before they’re fully governed. They get API keys, access to CRMs, calendars, billing systems, and internal docs—and the first time you audit permissions is often after a close call. The good news is that you already have a high-signal dataset for tightening access: tool-use logs.
Tool-use logs (from agent frameworks, gateways, or your own middleware) capture what the agent actually tried to do: which tools it called, which endpoints, which resources, and with what outcomes. If you convert that trail into a permission boundary diagram and a least-privilege checklist, you can go from “we think it needs access” to “here’s what it demonstrably uses” in about 30 minutes.
The 30-minute workflow at a glance
This workflow is designed for a single agent or one automation “slice” (for example: inbound lead qualification → meeting scheduling → CRM update). If you try to boil the ocean, it won’t fit in 30 minutes.
- Minutes 0–5: Gather and normalize tool-use logs
- Minutes 5–12: Extract the tool inventory and data objects
- Minutes 12–20: Draw the permission boundary diagram
- Minutes 20–28: Convert diagram edges into a least-privilege checklist
- Minutes 28–30: Flag unknowns and define next logging improvements
Minutes 0–5: Gather and normalize the logs
Start with one representative time window: 1–3 days of production traffic or 20–50 agent runs. Pull logs from wherever you record tool calls (agent framework traces, API gateway logs, cloud audit logs, or a database table). Your goal is a single table where each row is one tool invocation.
Normalize into these fields (don’t overthink it):
- timestamp
- agent_name and run_id
- tool_name (e.g., “crm.search”, “calendar.create_event”, “billing.lookup_invoice”)
- target_system (CRM, ERP, Google Calendar, Slack, database, etc.)
- operation (read, write, update, delete, admin)
- resource (object type + identifier if available: Lead, Contact, Deal, Invoice, File)
- status (success, failure, rate-limited, permission denied)
- error_code (especially “permission denied” variants)
If you’re missing any of these, keep going anyway—you’ll log the gaps at the end.
Minutes 5–12: Extract the tool inventory and the data objects
Now you’re building the “what does this agent touch?” list. Create two quick outputs:
1) Tool inventory
Group by tool_name and count:
- How often it’s called
- How often it fails
- How often it returns permission errors
This instantly tells you what’s essential versus incidental. A tool called twice in 50 runs might be an edge-case feature or an unnecessary permission you can remove.
2) Data object inventory
Group by target_system + resource (for example, “CRM:Contact”, “Calendar:Event”, “Billing:Invoice”). This becomes the backbone of your permission boundary diagram and helps you avoid vague scopes like “CRM full access.”
If you’re standardizing objects across systems, it helps to define a consistent object vocabulary and ownership boundaries. A lightweight version of this approach is covered in this practical data contract for AI agents across CRM, ERP, and billing.
Minutes 12–20: Draw the permission boundary diagram
Your diagram needs to answer one question: Where does the agent stop, and where do external systems begin? A clean boundary diagram typically has four layers:
- User/Trigger: who initiated the run (webhook, human request, scheduled job)
- Agent Runtime: the model + orchestrator + prompt/config
- Tooling Layer: your tool router, function registry, middleware, or gateway
- External Systems: CRM, calendar, email, billing, database, file store
Draw boxes for each system and arrows for each tool call. Label arrows with operation + object (e.g., “READ Contact”, “WRITE Event”, “UPDATE Deal”). If you can, annotate arrows with the common scope names you currently grant.
This is where a text-to-visual workflow shines. If you can describe the boxes and arrows in plain language, napkin.ai can turn that description into a diagram you can refine quickly—useful when you need a clean artifact for a security review without spending an hour in a design tool.
Keep the diagram strict: if a connection isn’t in logs, don’t include it yet. You’re documenting observed behavior, not aspirational architecture.
Minutes 20–28: Turn diagram edges into a least-privilege checklist
Take every arrow in the diagram and convert it into a checklist item. Each item should define:
- System (where permission is granted)
- Identity (service account, OAuth app, role)
- Object (Contact, Deal, Invoice, Event, File)
- Operation (read/write/update/delete)
- Scope boundary (which subset of objects: only owned records, only a pipeline, only a folder)
- Justification (which tool calls require it; ideally reference log examples or counts)
- Monitoring (what to alert on: permission errors, unusual volume, new endpoints)
Then add two key columns that make this immediately actionable:
- Current access: what the agent has today
- Proposed access: what the logs prove it needs
Where “proposed” is narrower, you’ve found a least-privilege win. Where “proposed” is broader, you’ve found an engineering task (either permissions are too tight, or the agent is attempting something it shouldn’t).
Common reductions you can often make immediately
- Read-only instead of read/write for lookup steps
- Object-level limits (Contacts but not Companies; Events but not Calendars)
- Workspace or folder scoping for files and docs
- Time-bound tokens for high-risk operations
- Separate identities for “search” vs “mutate” actions so write access is rarer
Minutes 28–30: Flag unknowns and improve logging
End with a short “unknowns” list. Typical gaps include missing resource identifiers, missing request payload summaries, or tool calls that don’t map cleanly to operations (a single “sync” endpoint that does multiple actions).
If you do remote debugging or pair programming sessions to investigate agent behavior, make sure the access used during those sessions is auditable and can be locked down. The controls you’ll want are similar to those in a remote pair programming security playbook for auditing and locking down sessions.
Finally, commit to one logging upgrade that makes the next audit easier: consistent operation tags, a resource type taxonomy, or a middleware layer that standardizes tool events across frameworks.
What you’ll have after 30 minutes
- A permission boundary diagram that reflects observed tool use
- A least-privilege checklist you can hand to security or platform teams
- A short backlog of logging and permission fixes based on real failures and attempted actions
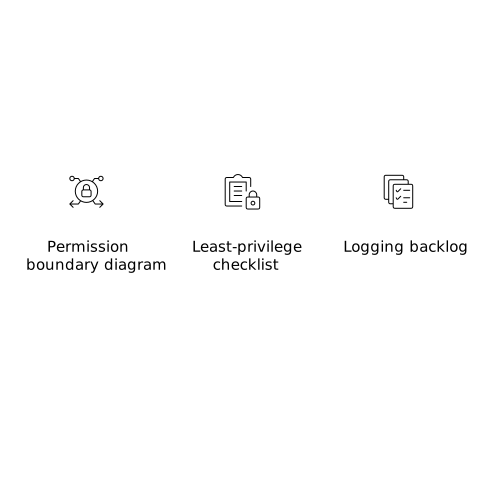
This turns agent governance into a repeatable loop: observe tool use, diagram boundaries, tighten scopes, and monitor for drift.
Frequently Asked Questions
How can napkin.ai help with permission boundary diagrams for AI agents?
You can paste a structured description of your agent, tools, systems, and allowed operations into napkin.ai and quickly generate a clear boundary diagram to review and refine.
What log fields do I need to build a least-privilege checklist with napkin.ai outputs?
At minimum: tool name, target system, operation (read/write), resource type, status, and an identifier like run_id. With those, you can translate each observed tool call into checklist permissions and then visualize the boundaries in napkin.ai.
Should I trust tool-use logs alone when tightening permissions for an AI agent?
Use logs as the starting point, then validate edge cases with tests. Logs show observed behavior; napkin.ai diagrams and the checklist help you spot missing scenarios, but you should still run controlled runs before removing broad access.
How do I handle tools that perform multiple actions behind one endpoint when documenting access in napkin.ai?
Break the tool into sub-operations in your documentation even if the API is coarse (e.g., SYNC includes read+write). In napkin.ai, draw separate arrows for each implied operation and require compensating controls like separate identities, stricter scoping, or extra monitoring.
What’s the quickest way to spot over-permissioned access using a napkin.ai diagram?
Compare each diagram arrow to the granted scopes: if your diagram shows only “READ Contact” but the identity has “CRM admin,” that mismatch is a clear overreach. The visual contrast in napkin.ai makes these gaps obvious during reviews.